
We are going to learn how to add the Active Directory as LDAP in identity Source of the vCenter.
What do we achieve: We will able to add the AD users to the vCenter Roles and allow them access the vCenter using the AD credentials.
Why use LDAPS: LDAPS (Lightweight Directory Access Protocol Over Secure Socket Links) LDAPS is a distributed IP directory protocol similar to LDAP, but which incorporates SSL for greater security. The default port for an LDAPS service provider URL is 636.
- Login to the vSphere client where you want to configure LDAPS as identity source.
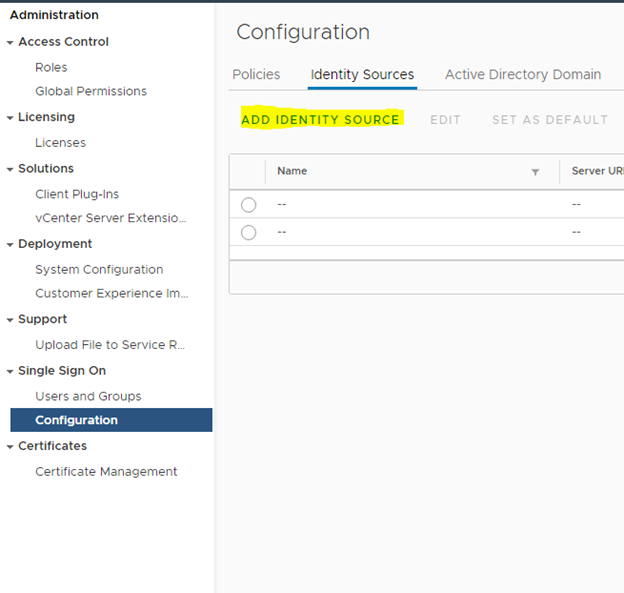
- Click on Menu –> Select Administration

3. Select Single Sign-on Configuration -> Identity Sources -> Add Identity Source
4. Select Active Directory over LDAP

4. Now we must enter the details to configure AD as LDAPS.
Format Explained:
- Name = domain name
- Base DN for users: dc=domainname,dc=local (This option to search user’s in specific organization unit OR container of AD).
- Base DN for groups: dc=domainname,dc=local (This option to search AD group’s in a specific organization unit OR container in the Active Directory)
- Domain name: name of the domain
- Domain alias: domain-name
- Username: DN of the username
- Password: Password for the user account mentioned above
- Primary server URL: ldaps://Domaincontroller name:636
- (You can mention domain name instead of specific DC if all your domain controller’s configured to use SSL for LDAP)
- Secondary server URL:ldaps://Domaincontroller name:636 (optional)

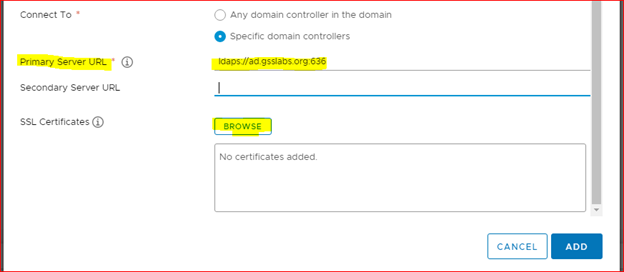
5. We need to add the SSL certificate for active directory server which we have mentioned as the Primary Server URL. How to get it is big question for many, please follow the below steps to get the certificate,
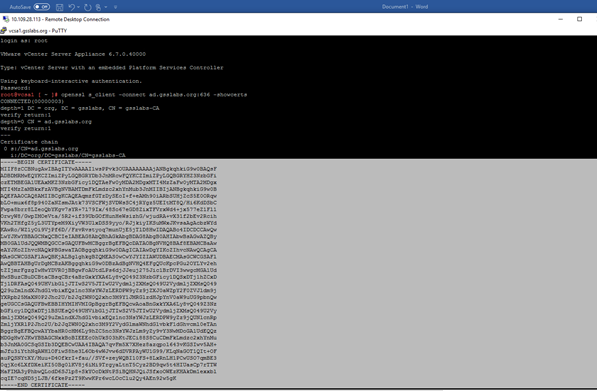
- Login to vCenter appliance SSH session (using putty).
- Type in the command: openssl s_client -connect domainname:636 -showcerts
openssl s_client -connect ad.gsslabs.org:636 -showcerts
- Once you type you will get the below output.

- Copy the complete string from —–BEGIN CERTIFICATE—– to —–END CERTIFICATE—–
- Paste it in any of the Text editor and save the file as ldapcert.cer and when you are saving the file select Save as type: as all files


- Now click on browse in the configuration Tab in vSphere client and the select the certificate file ldapcert.cer and click on Open.

- Now your certificate will be added as below and now Click on Add,

7. Now the Active Directory as LDAPS is successfully configured.


Good One
LikeLiked by 1 person
excellent explanation
LikeLiked by 1 person
Provides clear understanding, Good article to refer!!
LikeLiked by 1 person
Worked like a Charm. Specially the screen prints to get the certificates.
LikeLiked by 1 person